Updated July 31, 2021
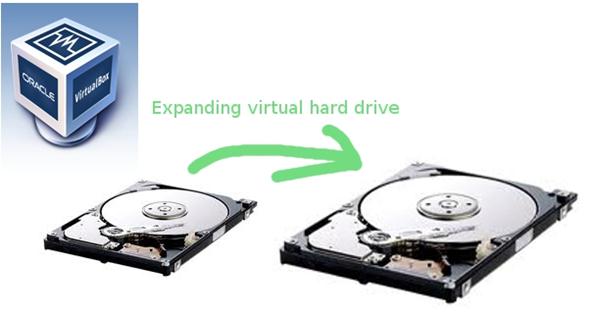
Often, people find their virtual machine hard disks are too small for usage needs. Below are steps showing you how to resize and expand an existing VMDK or VDI virtual hard drive in VirtualBox for use with a guest virtual machine (VM).
Things to Know Before You Start
- If you already have a dynamically allocated disk that is VDI or VHD linked to the virtual machine, simply use the VBoxManage modifyhd –resize command. e.x.
VBoxManage modifyhd <your filename> --resize 100000. That command would be for 100GB. You can then skip to the resize your guest OS step in this guide. If you’re not sure or don’t have it, read on. - If your hard drive is VDI, you can try the CloneVDI tool to resize your disk easily without and skip to the resize your guest OS step in this guide.
- There are suggestions below to help you avoid having to resize virtual drives ever again by using large dynamically expanding storage and can be completed in 10-20 minutes.
- Ensure your guest VM is powered off before executing the steps and that all hard disks involved are not connected to VMs.
Step 1: Create a New Hard Disk
Use VirtualBox to create a new hard disk (vdi) with your desired size. You can use the dynamically expanding storage or a fixed size disk. If you are expanding the hard disk capacity, choose a size significantly larger (e.g. double the size) than the original hard disk to avoid problems.
Note: Starting with version 4.0 of VirtualBox, to create new disk images, use the “Storage” page in a virtual machine’s settings dialog because disk images are now by default stored in each machine’s own folder. The screenshot below pertains to VirtualBox 3.0.

Disk Type should be the Same
Make sure the new disk you create is of the same type as your old disk you want to expand. So if you have an IDE hard disk already, create a new IDE disk. The same applies for a SATA disk.
Recommendation: Use a large size dynamically expanding storage
It is to your advantage to use a large dynamic hard disk with a high maximum storage space to save you from having to go through this resizing process frequently. Having a dynamic 300 GB or 2 TB virtual disk won’t actually take up 300 GB or 2 TB on your hard drive and only takes up the actual disk space used on the disk. The exception to the recommendation would be if the system storing your virtual hard disks has space restrictions and your hard disks tend to grow quickly (e.g. a virtualized database server sitting on a host machine with a small hard drive).
Use of a fixed-size storage
It is best to use dynamic storage; however, some people have experienced problems using the dynamically expanding storage and using the fixed-size storage solved their problems.
Step 2: Clone Your Old Hard Disk
You can clone your old hard disk with the VirtualBox VBoxManage command. Make sure your VirtualBox directory containing the VBoxManage command is in your operating system path or you can execute the command below from the VirtualBox with absolute paths (e.g. ~/.VirtualBox/HardDisks/old_hard_disk.vdi). If you are in the directory containing your HardDisk folder (e.g. ~/.VirtualBox/HardDisks), run the following:
VBoxManage clonehd old_hard_disk.vdi new_hard_disk.vdi ––existing
Notes on using VBoxManage:
- There are *2* dashes before ––existing.
- The commands shown are case sensitive and should be entered as shown. VirtualBox documentation contains more info on VBoxManage and command syntax.
- If you are running VBoxManage in Windows and are not running the command in the same directory as the hard disks you are cloning, you may have to add quotations ” ” around your hard disk paths so the command can recognize the location of the hard disks. For example:
C:Program FilesOracleVirtualBox>VBoxManage clonehd "c:extUbuntu64Studio.vdi" "C:Folder With SpaceNewHardDisk.vdi" --existing
- Make sure to follow the syntax ordering given by the VBoxManage command, otherwise you may get an error like Invalid parameter ‘C:FolderWithSpaceNewHardDisk.vdi’.
The command will work if your old disk is in the vdi and also the VMDK format. The “–existing” parameter tells VirtualBox that the clone operation is to an already existing destination medium. Only the portion of the source medium which fits into the destination medium is copied. Since the new_hard_disk.vdi for us is larger than the old_hard_disk.vdi, all the source will be copied to the destination (e.g. entire guest hard disk).
Note for VMDK images: Your original VMDK guest image could be in one VMDK file or split into multiple VMDK files done by a virtualization program like VMWare. The advantage of having split files is it makes it easier to backup to DVDs and discs. After the cloning, you will only have one large VDI. To back up to disc media you’ll have to use a program to split the guest image (e.g. guest’s own tools or file splitters)
Cloning hard disks… you see something like the following
Oracle VM VirtualBox Command Line Management Interface Version 3.2.12

(C) 2005-2010 Oracle Corporation All rights reserved.

0%...10%...20%...30%...40%...50%...60%...70%...80%...90%...100%

Clone hard disk created in format 'VDI'. UUID: ee28ab8b-8232-4c76-8c1b-184afdd1dd27

Step 3: Update the Guest Hard Disk
Replace the old guest hard disk with your new hard disk (i.e. new_hard_disk.vdi):
- Go to the settings for the guest VM and choose the “Storage” options.
- Select the appropriate controller (e.g. IDE Controller, SATA Controller) and add your new hard disk.
- Remove the old hard disk from the Storage section of your guest.
Step 4: Resize the Guest File System
If you boot into your guest operating system (OS), the file system will continue to only use the old hard disk partition set up. To use the increased disk space visible the OS, you can use disk partition management commands. The steps for the resizing the disk can depend on your operating system.
For Windows environments
Windows 7/10, Windows Server 2008
You can boot into Windows using the new hard disk and use the “Disk Management” utility to extend your hard disk volume. Right click on the drive you are extending and select the extend command.
Windows XP, Windows Server 2003, Windows 2000
Microsoft has a good knowledge base article on partition management for these versions of windows. Alternatively, you can use this partition manager tool from Aomei which works on a variety versions of Windows.
For other environments like Linux and Mac
You can use a Gnome Partition Editor GParted boot disk / live CD to resize the disk partition so the guest file system knows about the increased disk space. To use GParted on the guest, configure the guest to boot from the GParted CD (General -> Advanced tab set CD/DVD Rom as the first boot device, then select GParted CD). Instructions for using GParted and resizing disk partitions can be found at the GParted website or Google GParted resizing for several walkthroughs.
Note on Logical Volume Management (LVM) disks / partitions (common for Fedora installations)
You can graphically manage lvm partitions using the system-config-lvm Linux tool. Documentation for system-config-lvm is available for various flavors of Linux online and a comment from David in the comments section has confirmed this method works on Ubuntu 10 Server.
If you cannot use system-config-lvm, here are other options:
- Try GParted. GParted currently (December 2012) has some support for lvm (source: http://en.wikipedia.org/wiki/GParted). There is no easy way to expand a partition using lvm with the file system in the logical volume as supposed to ext3 or ext4 partitions.
- If the lvm partition does not contain the operating system, just create a new partition using GParted with ext3 or 4 (ext3 is safe) with the new virtual disk space. Go into the OS and copy all files from the lvm to the ext partition. Remove the lvm partition later after you have confirmed the files are converted and not in use.
- If the lvm partition contains your operating system (root lvm), either (1) copy your key files (e.g. /home/) to a backup and reinstall the OS or (2) attempt to convert the lvm to a different kind of partition or expand it. The (2) second option’s instructions are more complex due the active root partition and other things like resizing the file system. However, if you know Logical Volume Management (LVM) administration well, you can find some instructions on the internet and comments on this article from “zuzu”.
References

- Gnome Partition Editor – http://gparted.sourceforge.net/
People’s Experience with These Steps
You can find in the comment section of this article other people’s experiences with these steps and their tips.
THANK YOU Readers!
This post has been enhanced several times thanks to reader comments.

VboxManage: command not found
Linux is case sensitive… the “b” should be “B”.
I looked for answers for some time so thought I might save others the struggle.
zeddock
LikeLike
Thanks Zeddock for the feedback, you’re likely right that others got the same error due to the case.
The post now has a note to readers to pay attention to the case of the commands.
LikeLike
Suppose the Disk is /dev/sdb, the second scsi disk:
fdisk /dev/sdb
create as many partitions as you need using command n
Label them with command t as 8e for making it Linux LVM
Write and Exit with the command w.
Format the partitions you require using mkfs command:
mkfs -t ext3 -c /dev/sdb1
LVM commands:
pvcreate /dev/sdb1
vgextend VolGroup00 /dev/sdb1
lvextend -L 15G /dev/VolGroup00/LogVol00 ;for extending LogVol to 15GB
lvextend -L+1G /dev/VolGroup00/LogVol00 ;for adding one more GB to Logical Volume LogVol01
resize2fs /dev/VolGroup00/LogVol00 ;for resizing the Logical Volumes
LikeLike
Thanks zuzu for LVM instructions. There’s a reference in the post now to refer to your detailed comment.
LikeLike
Great stuff. However on the latest VirtualBox you will need to type in the “-” twice. So it will be “–exisiting” instead of “-existing”. Other than that, great. This is on Windows which I’m using.
LikeLike
Thanks Divine for pointing that out! You are absolutely correct.
Apparently the webpage filtered the two dashes, but it has been fixed using the HTML code for dash twice (––)
LikeLike
I am using VBox version 4.0.8 r71778
One note, I had to make sure both of my hard drives (the existing one and the newly created one) were not attached to the virtual machine, before I could get the clonehd commnad to work.
I also moved the –existing option to the end of the command.
LikeLike
Thanks Jonathan for pointing out that all drives should not be connected to VMs. Your comment has been added to the instructions “Things to Know”.
LikeLike
Hi
Thanks Justin for posting this, it has been a fantastic help in cloning the hd. One thing, I have been using a windows environment and I had been entering the VBOXManage –existing command as specified, from the Program Files\Oracle\VirtualBox directory where the VBOXManage program is stored, however the command was still not working. I had to add speech marks ” ” around “my old” and “new” hard disk directory paths for the hd to be cloned, otherwise I just kept getting the error “invalid parameter c:\directory\directory_path”.
I hope this helps anyone else with a similar problem.
LikeLike
Thanks a lot Guy for your tip (on behalf of other Windows users), it has been added to the notes about VBoxManage in the post.
And you’re welcome! glad the instructions were helpful and you could contribute your solution finding here 🙂
LikeLike
Thank you for this great share and wonderful read!! I definitely enjoying every little bit of it and I have you bookmarked to check out new stuff your upcoming blog posts…
LikeLike
Thanks Reda for the positive feedback! It is great to hear you enjoyed the read.
LikeLike
The simplest way is to use VBoxManage modifyhd command which allows to specify new hdd size.
LikeLike
Thanks budzes for pointing out the modifyhd command (http://www.virtualbox.org/manual/ch08.html#vboxmanage-modifyvdi). Definitely that command along with the resize option will aid people in increasing the logical size of disks and other options helping with space allocation of the disk.
LikeLike
7 Nov 2011. Justin, Is there some benefit of doing the expansion of a disk by your method rather than using the “modifyhd” command? I’m running Virtualbox 4.1.2 with a 40GB virtual drive which has a .vmdk extension and VB lists as “normal”. (I’m on a Mac OS 10.6.8 host with a Windows XP SP3 VM.) VB says the virtual disk size is 40GB, and actual is already 39.42GB, so I need to expand it, and soon! I’m not a techie at all and can not afford to mess this up. Seems to me the “modifyhd” is less hassle than what you recommended, which appears to me to be more involved and risky plan. My problem is I don’t really know what to type in Terminal to expand my drive. If I want it to be a 100GB drive, do I just type in “VBoxManage MY_HARD_DRIVE.vmdk –resize 100000”? [As typed, I have two dashes in there before the word “resize”; it may be that the wordpress system will change them to an en dash.]Or do I have to type in “102400” (1024 bytes x 100 = 102400 MB = 102.4GB, which may be the real value of what we call 100GB??). Sorry for the very specific question, but maybe there are other like me. Thank you.
LikeLike
Hi Eric,
If you are worried about corrupting your VirtualBox hard disk, the best thing would be to save a copy of your vmdk on your Mac OS host before attempting any of the commands or anything here in the article. If something does go wrong, you can always mount your backup disk as the real guest.
Given your comments, I believe modifyhd will not work due to the VirtualBox manual saying: “This [resize command] currently works only for expanding the capacity of VDI and VHD formats, and only for the dynamically allocated variants“. The issue with modifyhd resize is it only works in certain cases, otherwise there wouldn’t be a need for all the steps listed in this article.
However, you can try it following VirtualBox manual with the syntax VBoxManage modifyhd <your filename> –resize 100000. That command would be for 100GB. Make sure you have two dashes and read the details (takes about 2 minutes) at http://www.virtualbox.org/manual/ch08.html#vboxmanage-modifyvdi.
It should give you an error if the type of disk you are using is not supported.
The instructions in the article seem complicated, so he are a summary of the steps if it helps you:
1. Create a new disk with dynamically expanding storage that will solve your space issues forever (unless you reach a 2 TB hard disk).
2. Clone your existing hard disk to the new disk.
3. Attach the new cloned disk to your guest.
4. Resize the logical space in the guest to recognize the expanded space.
LikeLike
I hope you don’t mind if I continue my saga here. I got no help on the Virtualbox forums 😦
Seems that .vmdk disks cannot be expanded by modifyhd commands. I tried this command line
VBoxManage modifyhd ‒‒resize 102400 [that’s two dashes before the word “resize”]
and I got this error: VBoxManage: error: Resize hard disk operation for this format is not implemented yet!
LikeLike
7 Nov 2011
Hi again, Justin,
I didn’t realize you were up and responding so quickly to posts here 🙂 Thus my last post was sent before I read yours.
Now I’ve got real trouble: I first made a copy of the original 40GB .vmdk file in Finder on my Mac.
I decided to follow the long route (only route) and failed. I made a new .vmdk harddrive in VB (this time I made it 200GB dynamic).
When I tried to clone the old one, something didn’t work right and I got an error. Then I noted that I DID NOT have the new and old disk unattached to the Virtual Machine. I don’t recall the error. But I thought “No problem, I’ve got the backup HD on the Mac, I’ll use it and verify that my virtual machine will work with it. It didn’t. I attached the copy of the original HD, and tried to start the VM: Error: “Locking of attached media failed.” Details: Result Code: VBOX_E_INVALID-_OBJECT_STATE (0x80BB007). Now I cannot get either of my 40GB harddrives to work and I’m worse off than when I started. Any advice for newbies?
LikeLike
I am happy that I was able to restore the 40GB virtual drive file from an external backup drive and now the VM is back where it was at least. I just don’t know how to do what I need to do to expand it.
LikeLike
Hi Eric,
You know, just last year I was in a similar situation as you with a 40GB fixed size maxed out VMDK hard disk for a Windows guest.
So, if you follow the instructions here in the article, you will get a new large hard disk you can use.
After you clone your VMDK disk with the clonehd command (http://www.virtualbox.org/manual/ch08.html#vboxmanage-clonevdi) to a VDI, you just have to attach it to your VM and remove the old one. Since you’re using Windows XP, the remaining part is to resize the partition in the guest. There are some tips in the article including some free software you can use or you can try Microsoft’s method.
You’re smart enough to use VirtualBox so you should be fine following the steps here 🙂Good luck,
Justin
LikeLike
8 Nov 2011
Thanks, Justin. I’ll try again. I didn’t think I could clone a .vmdk to a .vdi file. Based on your response, I guess I can. (I saw that the tutorial said the new drive had to be the same kind as the old one, and thought that probably included not only SATA and other types, but also .vdi, .vmdk, etc.) I also saw that stuff in your tutorial about the partitioning and went to the MS site and the free program site. Looked a little daunting to me. When I do it I’ll probably try the free program route. I don’t feel comfortable at all with command line stuff. I’ll try again when I have some more time. Thanks again! I’ll try to remember to let you know when it works for me. 🙂
LikeLike
02 Jan 2012 Thank you, Justin! It worked, and I’m a happy camper. As a severe (or permanent) newbie, I’m glad to have made my 40GB .vmdk into a 503.5GB .vdi virtual disk. I couldn’t have done it without your help here. (BTW, I’m using a Mac running Snow Leopard 10.6.8 with a Win XP guest.)
Two suggestions (if I’m not the only newbie / non-tech person who might try to do this) regarding this part of the tutorial:
“Make sure your VirtualBox directory containing the VBoxManage command is in your operating system path. In the command line console, change directory to your HardDisk folder (e.g. ~/.VirtualBox/HardDisks) and run
VBoxManage clonehd old_hard_disk.vdi new_hard_disk.vdi ––existing
(1) I didn’t know how to make sure that the VirtualBox directory containing the VBoxManage command was in my operating system path. Maybe some instructions about how to find out, and how to make it that way would help. In my case, it was, since I just tried to use it, and it worked.
(2) I wasn’t sure how to change the directory/folder in the command line console (in my case, Terminal). I just guessed that maybe the command cd would work like it did back in DOS days. It did. But for others, maybe an explanation or link would be helpful.
I really appreciate your generosity in sharing all this info!
LikeLike
Hi Eric, you’re welcome and thanks for your detailed feedback. Based on your all your feedback the article has been updated (especially the VBoxManage comment) and I’m considering how to make the article easier to follow (like a short section outlining the steps and a detailed section with helpful links like the change directory command).
LikeLike
This post saved me a ton of time. Thanks!
LikeLike
Great to hear Mark. You’re welcome!
LikeLike
Great tutorial, thanks!
I run WinXP, so I needed a way to extend that partition, and found
http://www.extend-partition.com/free-partition-manager.html
Looks to have worked perfectly.
LikeLike
Thanks Todd for the heads up on the Partition Assistant tool for XP and other Windows. A link to the tool has been added in the article so other XP users like you will find it!
LikeLike
Great article, this saved me quite a bit of time having to reinstall an entire OS. I made the mistake of making the second drive a sata when the drive i wanted to clone was an ide but changed the new drive to ide and worked just fine. Thanks a ton!
LikeLike
You’re welcome Randy! and thanks for your comment. A reminder about ensuring the new drive matches the type of the old drive has been added to the article.
LikeLike
Hi folks… I’m brazilian and maybe gonna make some mistakes with your language. So…
I was working with a VM that has a Peoplesoft 9.1 installation built in and while I was creating datafiles in oracle to support FSCM tables the size of oradata increased until make my work impossible. Then I solved my problem resizing the VDI file with VBoxManage modifyhd command and
with the new space non allocated in hd I made a new volume and I mounted in principal partition as a NTFS folder. I named this folder as PSFT and I moved all my PSFT files to it.
I hope this solution can help you… The advantage is the fact of no extra software be needed.
Luis Alves
Peoplesoft Consultant at E-Novasys Tecnology (Brazil)
LikeLike
Hi Luis, thanks for sharing your troubleshooting. It will help anyone using Virtualbox to host databases, especially Oracle.
Sounds like your were able to get around the oradata size increases by using a new expanded volume and switching the partition used by Peoplesoft – PSFT. That is pretty interesting!
LikeLike
thanks for the post was so useful!!
LikeLike
You’re welcome Angelo!
LikeLike
Hi,
If you’re working with a LVM partition a nice little gui for lvm managment is system-config-lvm. I’m working with Ubuntu 10 server and this worked great. This lvm gui allows you to extend your lvm partition into the unallocated space you created through the VBoxManage clonehd as indicated in this article.
Thanks for the article Justin.
David
LikeLike
Thanks for citing the GUI lvm management tool David. Wish I had known about it earlier.
A reference to your comment has been added to the article to help other LVM users.
LikeLike
Very helpful
thanks!
LikeLike
Great to hear, you’re welcome!
LikeLike
Well done, Justin Tung. I found your article and see Todd krein suggested free partition manager. It fixed my low disk space problem for my XP. Not only saved me a lot of time. but also saved money. best software I have ever seen.
I would like to recommend it here again:
http://www.extend-partition.com/free-partition-manager.html
And here is a helpful article introduced the detailed information about partitioning hard drive, helped me a lot:
http://www.extend-partition.com/resource/how-to-partition-a-hard-drive.html
LikeLike
Very helpful thank you. My problem though is that after cloning, the new drive seems to be in an original state not the “current state” I assume this is something to do with snapshots but can’t figure it out. Is there a way to get my cloned drive to reflect my latest snapshot of the old drive. When I look at the settings it is set to “current state”
Thanks for your help
LikeLike
Hi Clive,
Thanks for your feedback.
The issue you have was encountered by lots of other people and there are different approaches.
Here are two possible solutions:
1. Consolidate all your existing snapshots into one state (use discard old snapshots function in GUI) so the current state is the only state which will solve your cloning problems. This solution is probably the easiest.
2. If you do not want to lose your snapshots, you could clone your *VM*, consolidate the snapshots and use the cloned HD for expansion while you still have the old VM for older snapshots.
Here are a variety of solutions you can find by searching that lists the details:
e.g.
http://geek.co.il/wp/2009/03/18/cloning-virtualbox-vm-snapshots
https://forums.virtualbox.org/viewtopic.php?t=791
LikeLike
I have done a easier way: http://rodrigoguarischi.wordpress.com/2011/11/24/expand-hd-size-in-virtual-box
LikeLike
Thanks Rodrigo for the citing the modifyhd command and instructions for Windows 7 guest when you have already have a dynamically allocated disk.
As said in a previous comment, it is definitely good for increasing the logical size of disks. Unfortunately, modifyhd doesn’t cover a lot of things some of the people here are looking for.
Per the VirtualBox manual: “–resize option allows you to change the capacity of an existing image…
This currently works only for expanding the capacity of VDI and VHD formats, and only for the dynamically allocated variants.”
LikeLike
it workd!
thankyou. u saved me headache.
virtualbox.. why cant they just put this feature in menu!>
LikeLike
Great to hear gyaru. I’m wondering the same thing you are and if Oracle will make expanding a hard desk in VirtualBox a feature in the future or automate the commands listed here.
A good solution going forward is always use dynamically expanding storage and use the maximum available size (e.g. 2 terabytes)
LikeLike
Thanks alot Justin! extremely helpful! just increased my zendto vmbox from 15gigs to 30gigs going to implement it on production soon! 🙂
LikeLike
Cool Sajid! More space is always nice for ZendTo for file transfers 🙂
LikeLike
CloneVDI tool is very easy to use for resize hd and partitions in Windows Hosts. At the end, you just have to extend the HD in the Computer management (Look for ´Administrative Tools´ in control panel).
LikeLike
Thanks Luis. I didn’t know about this tool until you pointed it out and should simplify the process for everyone!
I’ll make sure to add it as a option for people to try in a future version of the post.
LikeLike
Heya i am for the first time here. I came across this board and I in finding It truly helpful & it helped me out much. I am hoping to offer one thing back and aid others like you helped me.
LikeLike
hello
LikeLike
Hi Justin, great tutorial!
I’ve done everything as you wrote, but run into a problem that my VM Windows 7 doesn’t see the full size of the disk.
In the VM VirtualBox Manager, I see the new size, but the VM OS still sees just the old one.
Here are some screenshots:
VM Manager: https://www.evernote.com/shard/s207/sh/ef49eeb2-b4d0-4982-9af8-38da7bed57fa/91d6ed1b95b717ac75e1d8e2272514f0
OS Disk Management: https://www.evernote.com/shard/s207/sh/31fbb263-189b-4d7a-a7a6-52b54b5530d0/edea8397a84216806f1358cce0499836
Maybe you have some suggestions…Thanks!
LikeLike
Hi Bojan, you’re welcome!
Looks like the screenshot is indicating Windows not recognizing unallocated space in the virtual drive. I am guessing you tried the extend function in disk management already but won’t work since no space is visible.
Some other things I was thinking of doing to check the virtual disks – they’re things I’d try:
– Refresh disk management and get it to check Disk 0 space again.
– Detach the cloned disk, boot the system then shutdown, re-attach and boot into Windows and check if the space appears.
– Maybe issue with disk management. Create a new disk and attach to the VM and see if Windows can see it.
– Maybe something is wrong with the cloned disk. Clone a new disk with a different capacity from the original disk and try that new disk instead.
LikeLike
Thanks for the swift response. So I should clone the disk, even though it’s a dynamically allocated disk with vdi extension. I’ll try that and let you know.
LikeLike
Hi Justin,
I am using Oracle VirtualBox 4.2.12 with a Windows XP 10Gb VHD, and need to make it bigger.
I can’t work out how to use the command prompts in your tutorial. I created a new 30GB VHD as a slave then cloned the whole thing but I can’t work out how to transfer the old 10GB primary master to the new 30GB secondary slave.
Thanks,
Alan
LikeLike
Hi Alan,
You have two options depending on what you’ve completed:
(1) If you were able to clone your old hard disk into the 30 GB VHD, you just have to remove your old primary VHD from the virtual machine in the storage section of the VM configuration and add your new 30GB VHD. VirtualBox will then use it the new as your the primary disk when booting up and you can follow the steps above to enlarge your old Windows drives.
(2) If you just created a new 30 GB VHD, you can clone the old 10 GB disk into the 30 GB disk using the commands listed above like so:
VBoxManage clonehd 10GB.vdi new_30GB.vdi ––existing
Then follow the steps to replace your old VHD with the new VHD in the VM configuration.
LikeLike
Nice article, thanks. For me to resize my virtual disk on a Mac Virtualbox Host took the following steps:
– Shut down the virtual machine and stop VirtualBox
– Move to the local VM directory on the Mac (I have an OpenSuSE guest called “OpenSuSE non-GUI”):
> cd /Volumes/Macintosh HD/Users//VirtualBox VMs/OpenSuSE non-GUI
– Find the right disc by ls -al (in this case it’s “OpenSuSE non-GUI.vdi” – this is also defined in the VirtualBox config)
– Resize to e.g. 25GB using the following command:
> VBoxManage modifyhd OpenSuSE\ non-GUI.vdi –resize 25000
LikeLike
Thanks Sam for the instructions on Mac!
Looks like they’re perfect for an Unix based system too.
LikeLike
On my OSX mac host the VMBox resize vdi seemed to work ok but I’m finding that Windows 7 doesn’t allow me to increase the size of the fixed size partition. The disk was created as fixed rather than dynamically expanding (Windows recommends this in their dialog.) Now “Extend Volume” is greyed out, not available for choice. Any thoughts on how to correct this? Thanks.
LikeLike
Hi Bruce, It sounds like the host VDI is ok and it is a Windows 7 issue. My first reaction is to look at possible ways to resize partitions in Windows or use a Windows partition manager. Google results for extending Windows partitions
LikeLike
Worked perfectly on my MacBook Pro running Sierra! Thanks! I just used the “VBoxManage modifyhd” Terminal command you gave and then booted to the GParted ISO.
LikeLike
Great to hear the terminal command worked Randall!
LikeLike
Article is a few years old but I was able to use it as intended. Many thanks for this invaluable article.
LikeLike
Welcome : -)
LikeLike